NAIL GRINDER Replacement Band
Take your grooming routine into your own hands by implementing the FURminator® Ultimate Hair Reduction System™: Brush, deShed, Bathe and Maintain for grooming confidence in the comfort of your own home. Our deShedding tools, grooming tools and hair solutions offer a grooming regimen catered to any dog or cat.
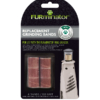
Keep your FURminator® Nail Grinder working properly with FURminator® Replacement Grinding Bands. This pack contains 6 replacement bands at 120 grit. The FURminator® Nail Grinder files and smooths nails with ease on both dogs and cats. Pets need their nails trimmed on a regular basis. Untrimmed nails can affect their comfort and health and cause them to develop sore feet, legs and hips. Make nail care part of your in-home grooming routine. For best results, use with other FURminator® grooming products as part of a complete regimen.
- REPLACEMENT GRINDING BANDS: Proper replacement bands for the FURminator® Nail Grinder, sold separately.
- 6 REPLACEMENT BANDS: This pack contains 6 replacement bands at 120 grit.
- FILES AND SMOOTHS NAILS: Use the FURminator® Nail Grinder to file and smooth your pet’s nails with ease.
- GAIN GROOMING CONFIDENCE AT HOME: Keep your FURminator® Nail Grinder working properly for more grooming confidence at home.
- FOR REGULAR USE: For best results, use with other FURminator® grooming products as part of a complete regimen.


")